Data grid provides the developer to display information from different sources in structured format that is pleasing to the eyes of the End User.
Data grids can usually display large amounts of Information in a systematic manner with different options to customize it further for different interfaces.
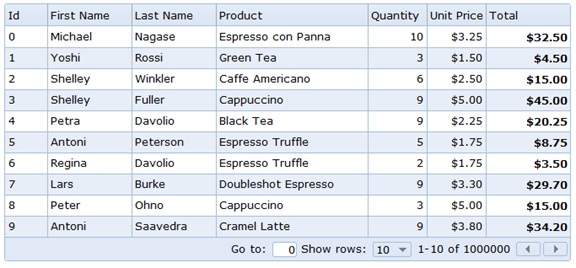
Example of Data Grid is Shown Below:
Angular has no Inbuilt Ready-to-use Data Grid.
We must use a Third Party Data Grid for Angular.
There are many Third Party Data Grids available for Angular.
They are as Follows:
For this Basic Tutorial and Demonstration we will use AG-GRID as it is one of the most used and easy to implement.
For this demonstration we will use a pre-build application and modify it to use ag-grid.
We can either add ag-grid to an existing application.
First we must install AG-grid dependencies using the node.js command prompt.
Type in the Command Prompt terminal these two Commands:
Now add the following code to the Top of your Component:
import {AgGridModule} from 'ag-grid-angular/main';
Also reference the Ag-grid component in Module:

Last but not Least let's reference the ag-grid in our component:

The row data defines the data which is received from an external source such as a Database.
While ColumnDefs represents the schema or Column names for the Data Grid.

Prerequisites for this demonstration:
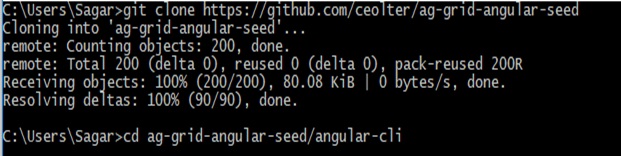
After Installing the Prerequisites now Open GIT CMD terminal and type the following code and press enter:
git clone https://github.com/ceolter/ag-grid-angular-seed
cd ag-grid-angular-seed/angular-cli

If you see the above screen in your GIT Command prompt it means your seed project has been successfully created in your Current Users folder
The Seed Project will contain 5 sub seed projects
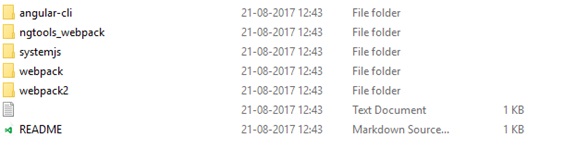
Choose the one you prefer and delete the others.
For this Example we will choose angular-cli as our Startup Project.
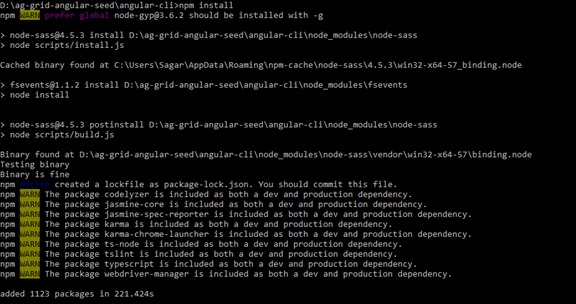
Next navigate to the package.json file in our seed project and type:
npm install
This might take a couple of minutes…So hold on
If your npm is successful you will see the following screen :-
Now we need a IDE let's use Visual Studio Code.
Here is the link to it: https://code.visualstudio.com/download
Great Now that we have Visual Studio Code downloaded and Install
Let's open our project in Visual Studio Code
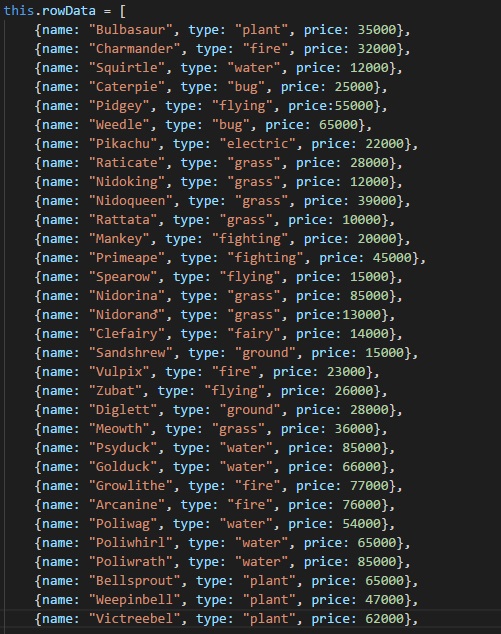
Now add a lot more entries to rowData and change the ColumnDefs as you desire.
Having a large number of entries will help us in the further section of this example.
Here we provide rowdata as an array of JavaScript objects to display data:
To display data in a Tabular Manner we need Column and Row Structure here Column definitions provides us a way to define column names (Header Names) and there data sources (Fields).
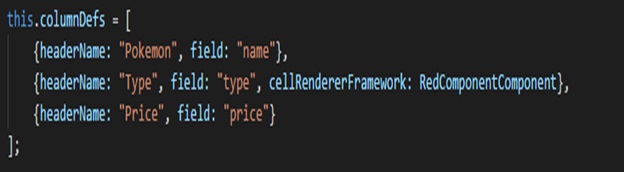
In the above code we have cellRendererFramework
This allows to further customize and render the data in the particular cell of the grid which in this case is type
It does not slow down or affect the performance of Angular in any way
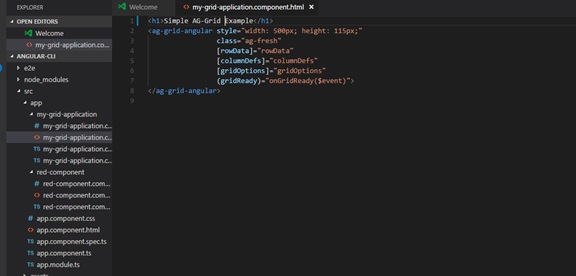
Now that we have our ColumnDefs and rowData setup.
How do we actually define our grid in our Component Template?
Well by using the ag-grid-angular in our html Template
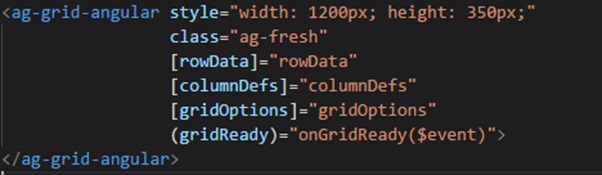
We can customize the size and style of the grid in the current element as shown above.
Well those features are already built in we just have to enable them.
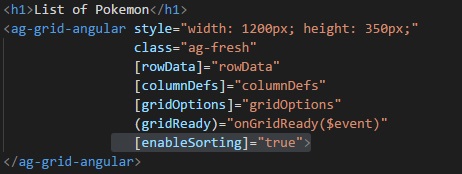
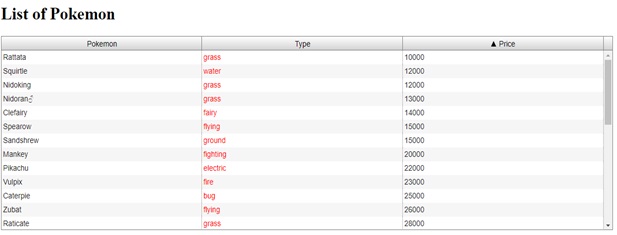
Let's start off with sorting we need a sorting feature to get list which we can sort the most expensive item to the least expensive one.
To get this Functionality you need to add the following code to your Template
Now open your Visual Code terminal and Type
Type localhost: 4200 in your browser as node hosts our application on this server address
Output:
Now let's say we want to find a particular record from the list.
In a Corporate application the Data could be in the thousands and millions.
We need a way to filter through this data to only find what we are looking hence we need to enable Filtering.
Like Sorting we need to add a single line to code to the Template HTML:

Output:

If we want a particular number a record on page for a more stark and beautiful look the answer would be to use Pagination.
This is how we include Pagination in our Application and the large records we have added come into play.
Let's add the following code in my-grid-application.component.ts :-
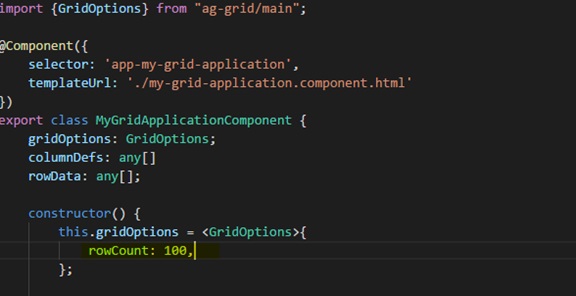
rowCount represents the maximum number of Data we want to count in this particular Application for the sake of simplicity let it be 100.
Also add this code to your Template
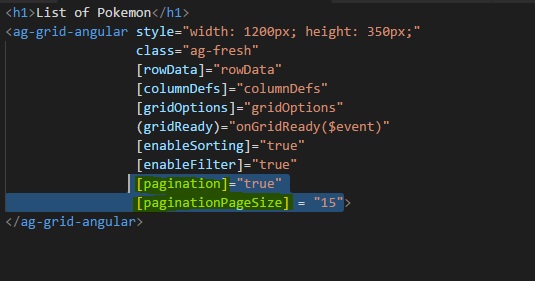
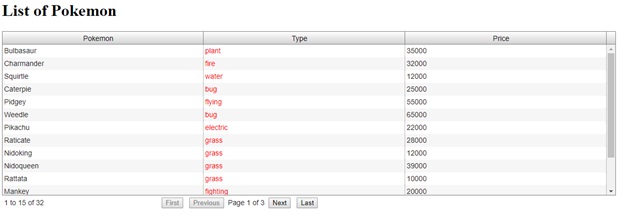
By writing [paginationPageSize] = "15" we are saying that we only want 15 records per page.
By writing this code we can navigate not only to the next and previous page but also to the first and last page.
This function of pagination will help us traverse through large data from any source.
Output:
Now with a few parting conclusions we can say that AG-Grid provides us with a lot of inbuilt ready-to-use code which we can use to provide the end user a more simplistic and immersive experience.
For Further details of other additional features please the ag-grid website.